
A good water damage estimate tells one story: the sketch, the line items and the drying logs all agree. When they do, the file is easier for a carrier to review and less likely to generate questions about demo scope, equipment counts and equipment days.
This guide explains how to write a water damage estimate in Xactimate, covering the full mitigation workflow from the first room sketch to the final quality check, with a worked example you can model your own files on.
How Do You Write a Water Damage Estimate in Xactimate?
To write a water damage estimate in Xactimate, start a new project with the correct price list, sketch every affected room and flag the wet surfaces. Record moisture readings and assign the water category and class. Then add demo line items for unsalvageable materials, add containment where needed, add drying equipment sized to the affected area, set equipment days from your daily drying logs, attach your documentation and price the estimate.
The Mitigation Estimate Workflow at a Glance
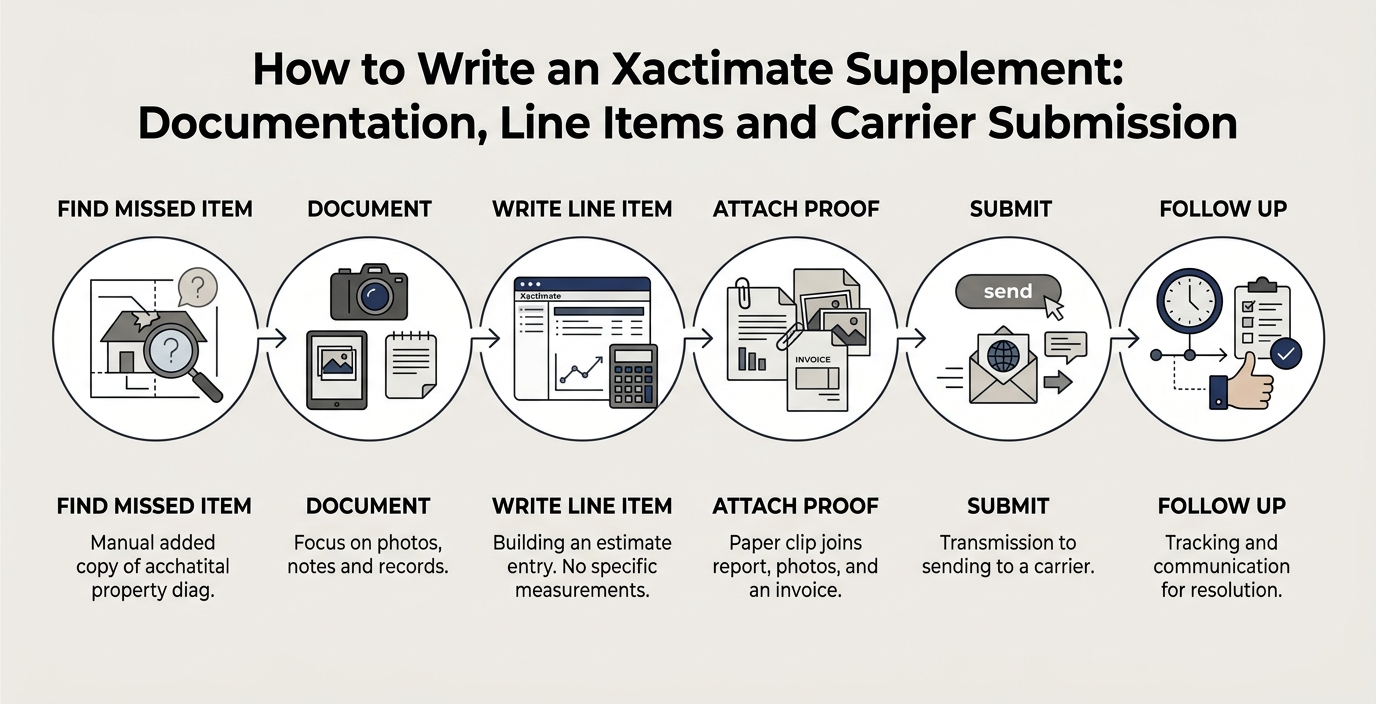
Seeing the whole map first keeps the file organized. Most estimators follow this order:
- Sketch the loss: Draw every affected room, wall, ceiling and floor.
- Record affected areas: Note wet materials, dimensions and moisture readings.
- Classify the loss: Assign water category and class.
- Add demo: Remove unsalvageable materials such as carpet pad, drywall and insulation.
- Add containment: Poly barriers, negative air and protection where the loss requires it.
- Add equipment: Dehumidifiers and air movers sized to the affected area.
- Set equipment days: Base duration on class and daily logs.
- Attach documentation: Photos, moisture maps and drying logs.
- Price and review: Check line item coding and totals before submission.
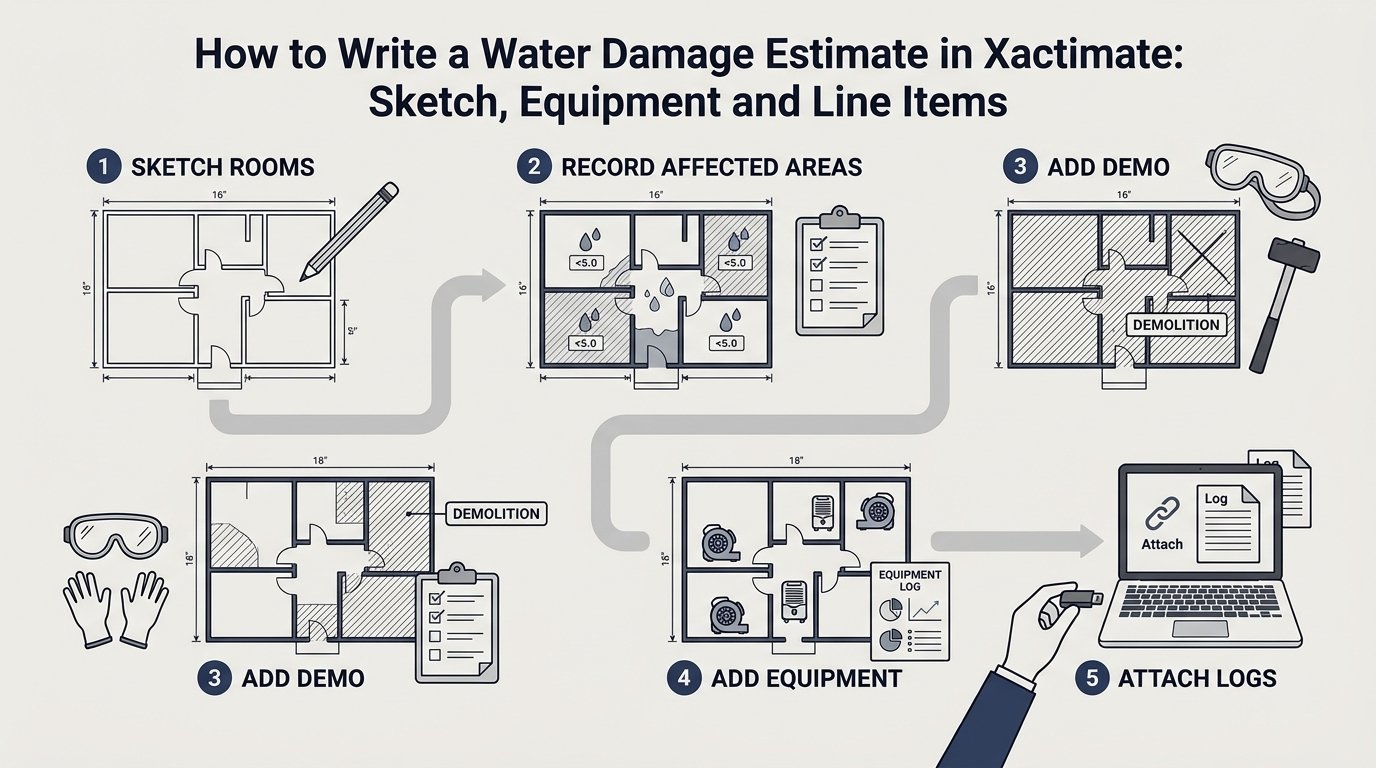
In practice these steps overlap. Equipment is often set on day one, before the estimate is finished. But each step feeds data into the next, so the sketch and classification should be settled before you finalize line items.
Step 1: Build an Accurate Water Damage Sketch
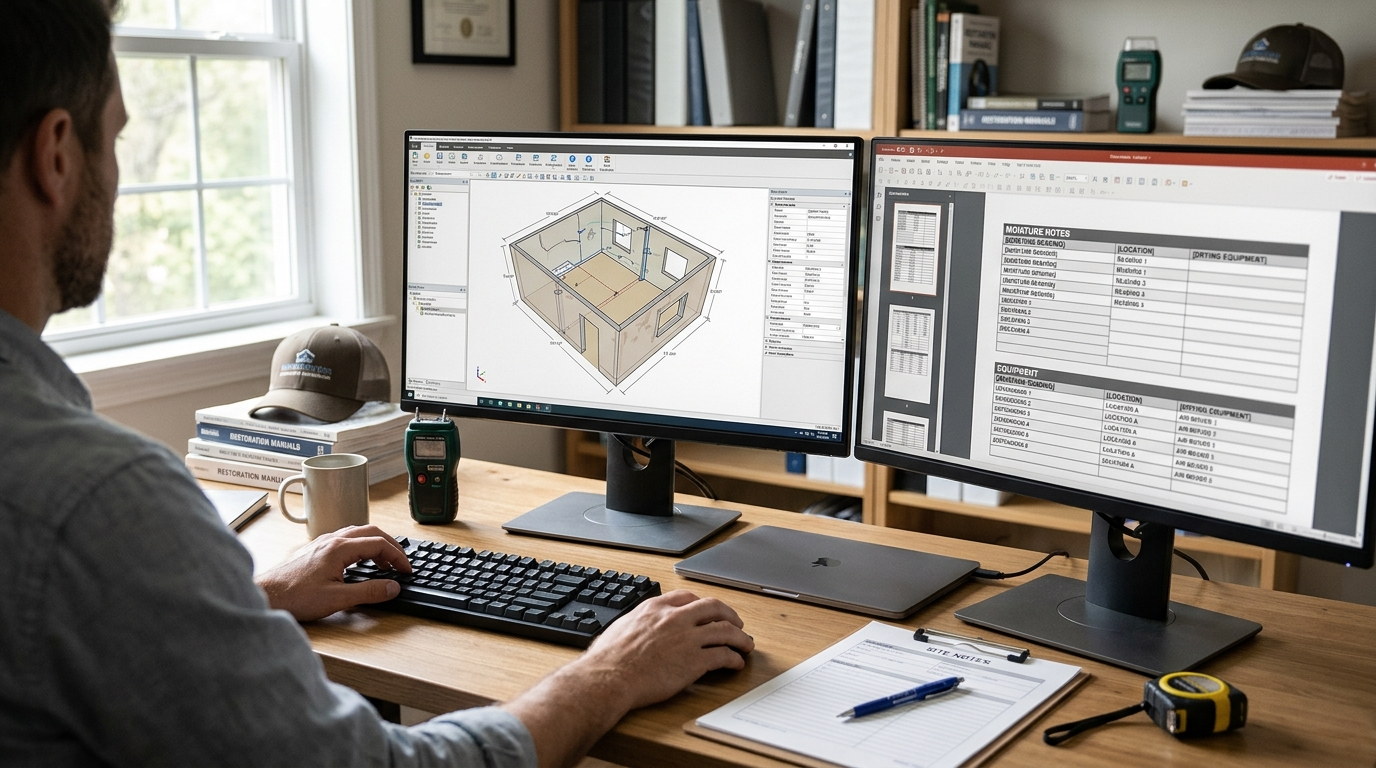
The sketch is the foundation of how to write a water damage estimate in Xactimate. Reviewers judge the file by it first, and Xactimate uses it to calculate the square footage and linear footage behind your demo and equipment quantities.
Start a new project, enter the insured’s information and select the correct regional price list for the loss location and date. Then open the Sketch tab. Draw each room to scale with the wall tools and label it clearly: Living Room, Kitchen, Hallway, Bedroom 1. For each room, record ceiling height, floor covering, wall finish and base type.
Then mark the affected surfaces so wet drywall, carpet and pad are clearly distinct from dry areas. If only the bottom two feet of a wall is wet, sketch it that way. A partial-height flood cut is more credible than full-wall removal.
A few habits that pay off downstream:
- Sketch adjacent unaffected rooms so the reviewer sees the full layout.
- Use levels for multi-story losses. A missed staircase skews equipment counts.
- Group rooms into zones on larger losses, since containment and equipment follow zones.
- Label stairwells, closets and pantries individually. They hold equipment and affect calculations.
Step 2: Record Moisture Readings, Category and Class
Documentation is what separates a well-supported estimate from a questioned one. Before writing line items, collect baseline dry-standard readings, readings on affected materials, and daily readings through the drying period.
Then classify the loss using IICRC S500 definitions:
- Category 1: Clean water from a supply line or overflowing sink.
- Category 2: Significantly contaminated (gray) water, such as discharge from washing machines, dishwashers or shower overflow.
- Category 3: Grossly contaminated (black) water, such as sewage, rising floodwater and most groundwater or sump backups. This drives more aggressive demo and PPE line items.
- Class 1 to 4: How much of the structure is wet and how quickly it will dry, from a small, fast-drying area (Class 1) to deep saturation in dense materials such as hardwood, plaster and concrete (Class 4).
The water category can also change over time. Category 1 water can degrade to Category 2 or 3 as it sits, depending on factors such as elapsed time, temperature and the materials it has contacted, so document when the loss occurred and when it was discovered. This step matters because category determines what must be removed, while class determines how much equipment and how many equipment days the job needs. Contaminated water can also change what is salvageable, so confirm the category before you finalize the demo. For losses involving microbial growth or mold-related scope, see our mold damage estimating services for additional estimating support.
Step 3: Add Demo and Containment Line Items
With the sketch and classification done, move to the Estimate tab and build your water mitigation line items in this order.
Demo First
Remove what cannot be saved: saturated carpet and pad, baseboards and toe kicks, drywall (partial or full height), insulation, and laminate or hardwood that won’t dry in place.
Typical line items include:
- Tear out wet carpet and pad, per square foot
- Remove baseboard, per linear foot
- Flood cut wet drywall (2-foot or 4-foot), per square foot
- Remove wet insulation, per square foot
- Debris disposal, per cubic yard or per ton
Then Containment
If the loss involves Category 2 or 3 water, or work is happening near unaffected living space, consider:
- 6-mil poly containment barriers, per square foot
- Zippered entry doors
- Negative air machines with HEPA filtration
- Floor and contents protection in adjacent areas
Every demo and containment line should trace back to a flagged area in your sketch. That visual match makes the estimate easier to review and defend: the sketch identifies the affected areas, and the line items quantify the documented scope.
How to Find the Right Line Item in Xactimate
Choosing the right line item is one of the most important parts of how to write a water damage estimate in Xactimate. The Estimate tab holds thousands of items, and a close-but-wrong selection can change the quantity, the unit or the price. Use this routine for every line:
- Search by keyword. Type what the work actually is, such as “flood cut,” “carpet pad,” “baseboard,” “air mover” or “dehumidifier.” Try a second keyword if the first returns too many results.
- Read the full line description. Check the material, the height or thickness, and what the line includes. For example, a 2-foot flood cut and a 4-foot flood cut are separate selections, and some lines include disposal while others don’t.
- Check the unit of measure. Make sure the unit fits the work: square feet for flooring and drywall, linear feet for baseboard, and days (DA) for drying equipment. A wrong unit is a common reason quantities look off.
- Confirm it matches your sketch. The quantity should come from the flagged area, not a rough guess. If the sketch doesn’t show it, the line shouldn’t be in the estimate.
- Check for duplicates and overlap. Make sure you aren’t billing the same work twice, such as separate lines for removal and a combined removal-and-disposal item.
- Confirm the price list. Prices and descriptions can differ between regional price lists, so open the line in the list for the loss location and date.
When every line passes these checks, the estimate stays consistent with the sketch and the drying logs, which makes it easier for a reviewer to follow.
Step 4: Add Drying Equipment and Calculate Equipment Days
Equipment is where estimates most often go wrong, both under-claimed and over-claimed. Xactimate has built-in tools, but you need to understand the logic behind them.
Choosing Equipment
Add dehumidifiers (refrigerant, LGR or desiccant, depending on the conditions) and air movers. Equipment selection and quantities should be based on the affected area, moisture conditions, structure, drying goals and applicable restoration standards. Use the current IICRC S500 guidance and carrier requirements when determining the appropriate setup.
Always check the carrier’s guidelines too, since some set their own limits. Class 3 and 4 losses call for heavier setups.
Setting Equipment Days
Equipment days should come from your drying logs, not guesswork. Equipment stays on while daily readings show materials still above dry standard, and comes off once they reach it.
A Class 2 loss may dry within several days under favorable conditions, while hardwood, plaster and Class 4 assemblies can take longer depending on moisture levels and drying conditions.
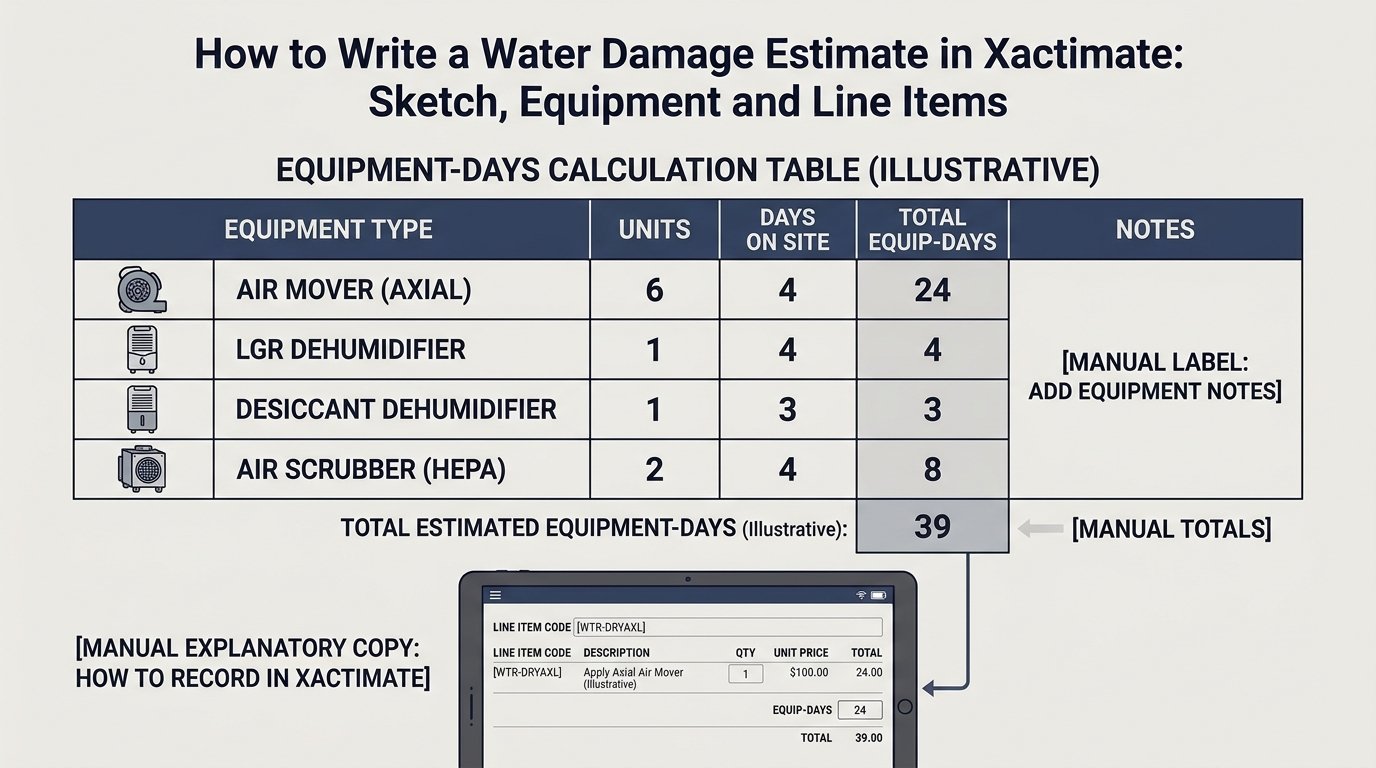
In Xactimate, drying equipment is typically priced per day (unit DA), so the quantity on the line is the number of equipment days. To get that number, multiply the number of units by the days they ran. For example, one dehumidifier running for 3 days is a quantity of 3 DA, and four air movers running for 3 days is a quantity of 12 DA.
Water Damage Xactimate Estimate Example
Here is a compact example for a Category 1, Class 2 loss: a supply line leak that wetted the carpet, pad and the bottom two feet of drywall in a 12′ x 14′ living room with 8′ ceilings (168 sq ft floor, 52 linear feet of wall).
Equipment quantities are shown as unit-days (DA), so 4 air movers running for 3 days are entered as 12 DA.
|
Item |
Quantity |
Basis |
|
Remove wet carpet and pad |
168 sq ft | Flagged on sketch |
|
Remove baseboard |
52 ln ft | Room perimeter |
|
Drywall flood cut, 2’ height |
104 sq ft | 52 ln ft × 2’ |
|
Debris disposal |
1.5 cy | Estimated from demo volume |
| Floor protection, adjacent hallway | 60 sq ft |
Protects dry flooring |
| Air movers | 12 DA |
4 units × 3 days, per S500 guideline for this room |
| LGR dehumidifier | 3 DA |
1 unit × 3 days, sized to room volume |
| Equipment monitoring | 3 visits |
Matches daily log dates |
Every number traces to the sketch or the logs. Your quantities will vary with the room, the materials and the regional price list, but this pattern is what a reviewable file looks like.
Need a mitigation or reconstruction estimate for a water or mold loss? Send the sketch, photos and drying logs to Rebuild Estimator for a review and quote.
Step 5: Attach Drying Logs and Run Final Quality Checks
Before submission, include everything the reviewer needs inside the file: photos, moisture maps, drying logs, equipment placement photos and any approvals for additional days.
If the carrier questions drying time, the logs are your justification, because equipment stays on only while readings support it.
Run this checklist before you price:
- Does every demo line match a flagged area on the sketch?
- Do equipment days match the log dates?
- Are category and class consistent with the line items? (For example, no Category 3 demo scope on a Category 1 file.)
- Is containment justified and scoped correctly?
- Have you taken equipment off the estimate for rooms that dried early?
Common Mistakes to Avoid
Even experienced estimators slip on these points:
- Guessing equipment days: Equipment days should come from your drying logs, not estimates made up front. Guessing is the fastest way to trigger a supplement request.
- Billing full-height demo on partially wet walls: If only the bottom two feet are wet, sketch the actual flood cut and bill accordingly.
- Skipping containment on Category 2 and 3 losses, or adding it where the sketch shows none is needed: Containment should match the water category and the layout of the affected areas.
- Leaving out baseline moisture readings: Without them, the carrier has nothing to compare your daily logs against.
- Leaving orphan line items: Every demo and equipment line should trace back to a flagged area in the sketch.
Run through this list before every submission. It’s also a good map of where most underpayments begin.
Conclusion
Knowing how to write a water damage estimate in Xactimate comes down to consistency. Build an accurate sketch, document your moisture readings, classify the loss correctly, and tie every demo and equipment line back to a flagged area. Then set equipment days from your drying logs, not guesswork. When the sketch, the line items and the logs tell the same story, the estimate is easier to review, explain and defend.
Use the workflow and checklist above on every file. If you’d rather have an expert review yours first, send your sketch, photos and drying logs to Rebuild Estimator for professional water damage estimating services.
Frequently Asked Questions
1. What’s the first step when learning how to write a water damage estimate in Xactimate?
When you write a water damage estimate in Xactimate, draw all affected rooms to scale, label materials and square footage, and flag wet surfaces before adding any line items.
2. How do I calculate equipment days in Xactimate?
Base equipment days on your daily moisture readings. Equipment runs from setup until materials reach dry standard, as documented in your drying logs.
3. Do I need to attach drying logs to an Xactimate estimate?
Yes. Drying logs, moisture maps and photos justify your demo scope, equipment counts and equipment days, and carriers expect them in the file at submission.
4. Is the workflow different for reconstruction after mitigation?
The sketch and documentation habits are the same, but reconstruction replaces demo and equipment line items with repair scope: drywall hang and finish, paint, flooring and trim.
5. How long does it take to learn Xactimate water damage estimating?
The basics of sketching, line items and equipment can be learned in a few weeks of practice. Speed and accuracy come from repetition and from comparing your early estimates against carrier feedback.