
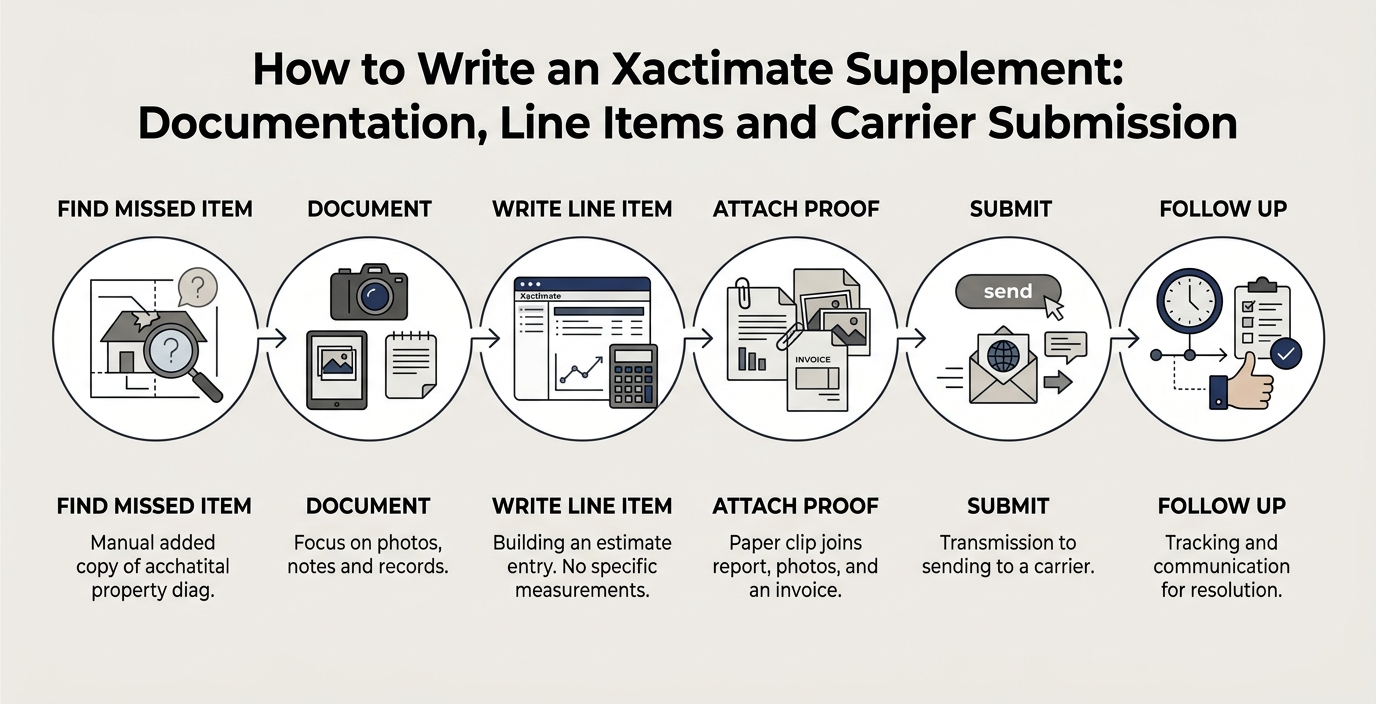
An Xactimate supplement is a revised estimate you send to an insurance carrier when the adjuster’s original scope misses work the property actually needs. Knowing how to write an Xactimate supplement comes down to one repeatable sequence: find the gap, document it, write the line items with notes, attach proof, submit, and follow up.
This guide covers each step the way a desk adjuster expects to receive it: photos, invoices, drying logs, line-item notes, the supplement narrative, and the ESX file you export for submission. If you’re working on a complex claim or don’t have time to build the estimate yourself, you can also hire an Xactimate expert to prepare and review the file before it goes to the carrier.
What Is an Xactimate Supplement?
An Xactimate supplement is a change to an insurance estimate after the initial claim scope has been written. Once work begins, contractors routinely uncover code-required items, hidden damage, or material and labor costs that don’t match the original pricing. The supplement documents those gaps and asks the carrier to approve the additional line items.
The quality of the file matters as much as the damage itself. Vague, unsupported, or poorly formatted estimates get flagged and delayed even when the loss is real. A supplement built on clean documentation moves faster and leaves a clear paper trail that protects both the contractor and the property owner.
Before You Start: The Supplement Checklist
Every supplement begins with a scope gap. Before you open Xactimate, review Xactimate supplement checklist to confirm you have:
- The original adjuster scope and estimate
- Date-stamped photos of the damage and any opened areas
- Supplier or subcontractor invoices
- Drying logs (for water mitigation losses)
- Local building code or manufacturer installation requirements, if code items are involved
If anything is missing, pause and collect it. Documentation gathered on site is generally stronger and easier to verify than evidence assembled after submission.
Step 1: Compare the Adjuster Scope Against the Actual Damage
Pull the original scope and walk the property with it, line by line.
- Mark required work the estimate omits, such as ice and water shield, drip edge, decking replacement, or code-driven electrical upgrades.
- Compare quantities. If the carrier measures 22 squares and the roof measures 26, that difference needs its own line item and a supporting measurement report.
- Flag items the estimate includes that the job doesn’t need. Removing them keeps your file credible.
On a roofing claim, the most commonly missed items on a roof damage estimate are additional tear-off layers, rotted decking, pipe boots, ridge ventilation, and detached downspouts. On water losses, check whether the scope includes drying equipment, monitoring visits, and demolition beyond what was visible at the first inspection.
If you can’t point to a specific scope gap, you’re not ready to write a supplement. This comparison is the foundation of everything that follows.
Step 2: Document Everything Before You Price Anything
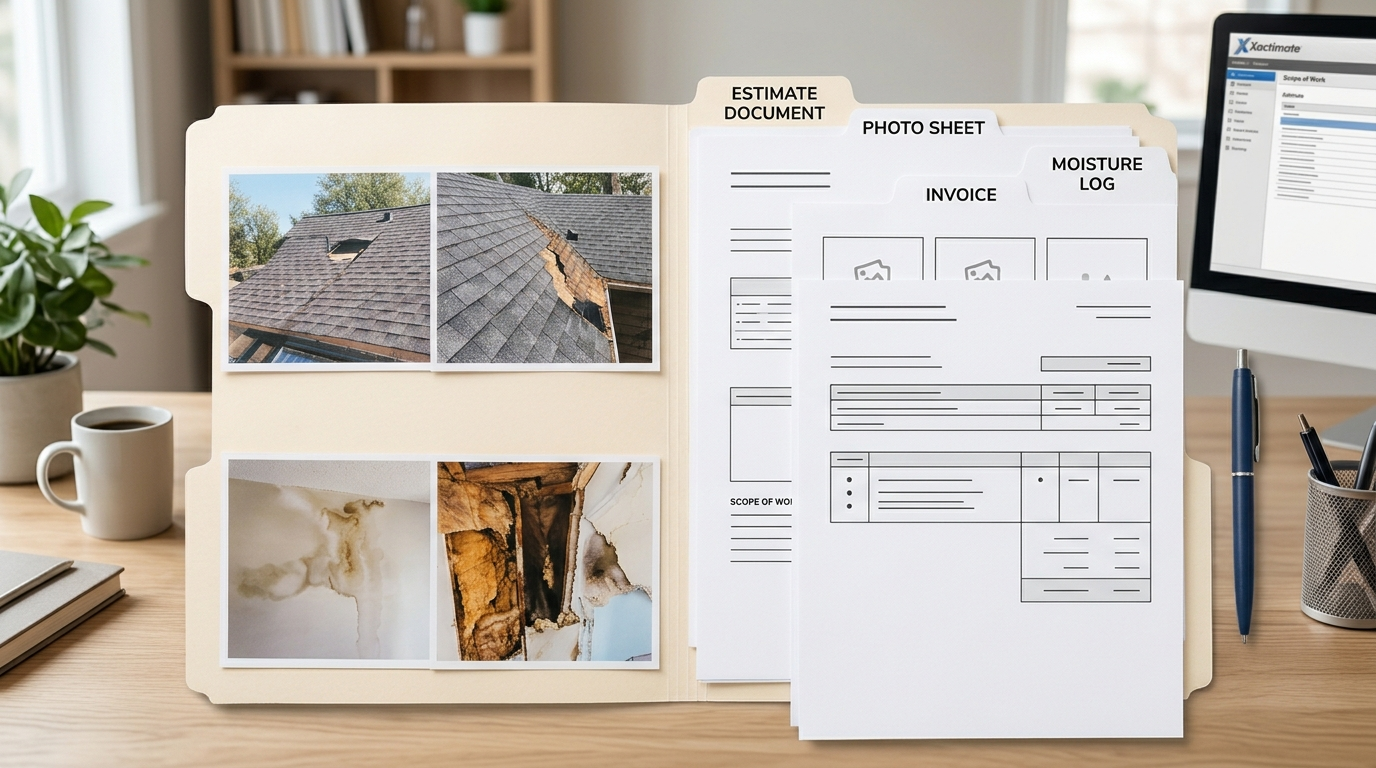
Strong requests rest on evidence, not assertions. Your documentation package should include:
- Photos: Wide shots for context and close-ups of specific damage. Date-stamped photos of the roof system, attic, subfloor, or moisture readings carry the most weight.
- Invoices: Supplier invoices, subcontractor bills, and disposal or dumpster receipts showing real costs. These documents can also help verify what goes into an Xactimate roof estimate when supporting additional roofing line items.
- Drying logs: Daily readings from dehumidifiers, air movers, and moisture meters. A complete log often supports equipment and monitoring line items included in water damage estimates.
- Code references: Excerpts from your locally adopted building code (commonly based on the International Residential Code) or manufacturer installation requirements that make the extra work mandatory rather than optional.
Documentation isn’t a side task. It is the supplement. Store everything in a single claim folder from day one, and building the estimate takes minutes instead of hours.
Step 3: Write the Line Items with Line-Item Notes
This is where learning how to write an Xactimate supplement gets practical: your documentation becomes a supportable estimate. Each added line item needs the correct Xactimate code, an accurate quantity, and a brief note explaining why the work is needed. The stronger the note, the easier it is for the reviewer to verify the scope.
Weak note: Add decking, roof needed.
Strong note: Replace 14 sheets of roof decking per tear-off inspection. Photos 12–18 show delaminated OSB at penetrations.
Best practices for line-item notes:
- Tie every note to a photo number, invoice, drying log entry, or code section.
- State what you found and where, not just what you’re charging for.
- Use plain language. Adjusters review hundreds of files, so make each note easy to understand at a glance.
- Keep measurements consistent across your sketch, photos, and supporting documents.
- On roofing supplements, order added trades in the same sequence as the original scope. Mirroring the carrier’s layout makes your file easier to review and reduces back-and-forth.
Step 4: Write the Supplement Narrative
The supplement narrative is a short cover letter that frames the entire file. A good one answers three questions in order: what changed, why it changed, and where the proof lives.
A simple structure:
- Summary: One sentence on the claim and the reason for the supplement.
- Scope gaps: A short list of omitted or under-measured items, each tied to a line item number.
- Evidence index: Where the photos, invoices, drying logs, and code references appear in your attachments.
- Request: A clear statement that you’re requesting approval of the additional scope, and that you’re available for a reinspection if the carrier wants to verify in person.
A professional narrative signals organization before the adjuster opens your estimate. Skipping it is one of the most common first-time mistakes, and it leaves the reviewer guessing at your logic.
Step 5: Export the ESX File and Attach Your Proof
When the estimate is complete, export it as an ESX file. ESX is Xactimate’s estimate exchange format, which lets the carrier’s reviewer open your work directly in their own Xactimate system.
Then package the full submission:
- ESX file of the supplemented estimate
- PDF estimate summary
- Supplement narrative
- Labeled photos
- Invoices and receipts
- Drying logs
- Code or manufacturer documentation

Step 6: Submit to the Carrier
There’s no single magic channel. The right approach is to follow the carrier’s stated process, which varies slightly from one company to the next. The standard path looks like this:
- Send the package to the desk adjuster or the claims email listed on the loss notice, or upload it through the carrier’s portal if one is required.
- Request written or system confirmation that it was received.
- Note the carrier’s stated review timeline and calendar a follow-up date.
- If the file stalls, escalate politely, ask whether more documentation is needed, or request a reinspection.
A reinspection request is not an admission of weakness. It’s a practical next step when the documentation doesn’t fully resolve a scope dispute or the reviewer needs to see conditions in person.
Step 7: Follow Up Until the File Moves
Many guides stop at submission. In practice, a well-prepared supplement still needs timely follow-up to keep the claim moving.
Review times vary with the carrier’s workload, the complexity of the claim, and how complete your submission is. Follow up every few business days, keep a log of calls and emails, and send any requested documentation promptly. Consistent follow-up on a clear, well-supported file helps prevent unnecessary delays.
Xactimate Setup Tips for Supplement Writers
A few technical habits make the process smoother:
- Keep your price list and region current so added items are priced correctly the first time.
- Use grouping (a roof group, a mitigation group) so the reviewer can compare added scope against the original.
- Duplicate the carrier’s estimate instead of starting from a blank template. This preserves the sketch and makes your additions easy to audit.
- Never delete carrier line items. Add corrections as new, clearly noted lines.
A clean, grouped, well-labeled file tells the reviewer you understand their workflow, and it lets you spend less time on formatting and more on the documentation that actually drives approvals.
Worked Example: A Roofing Supplement
Suppose a hail claim is scoped at 22 squares with a one-layer tear-off. During tear-off, you find two shingle layers, 18 sheets of damaged decking, and missing drip edge that your local code requires but the original scope omitted.
Here’s how you’d handle it:
- Photograph the second shingle layer and all delaminated decking, wide and close-up.
- Pull the decking invoice from your supplier.
- Add line items for drip edge per code, decking replacement at 18 sheets, and the additional tear-off layer, each with a note referencing photo numbers.
- Write a narrative summarizing the three additions and pointing to the evidence.
- Export the ESX file, attach the photos and invoice, and submit with a request for approval or a reinspection if needed.
The pattern holds on every claim: identify the gap, document the condition, add the line items, explain the changes, package the proof, and submit. Repeating the same workflow makes your process easier to manage as your supplement volume grows.
Common Mistakes That Stall Supplements
- Vague line-item notes with no photo or document reference
- Missing drying logs on water mitigation files
- Submitting a PDF only, with no ESX file
- No supplement narrative, leaving the adjuster to guess your logic
- Padding the file with items unrelated to the documented damage
- Inconsistent follow-up that lets a complete file sit in a review queue
Most delays trace back to documentation quality, not carrier intent. That’s why this process puts documentation first.
Final Thoughts on How to Write an Xactimate Supplement
Writing a strong supplement is really about discipline. Scope the gap, document the proof, write clean line items with notes, frame the file with a narrative, package the ESX file and attachments properly, submit, and follow up.
Once you know how to write an Xactimate supplement this way, the process becomes predictable, whichever carrier is on the other side. Carrier practices vary, so no approval outcome can be guaranteed. But documentation quality is fully within your control, and that is what this process is built on.
Need a carrier-ready supplement built from your photos, invoices, and scope notes? Send your claim documents to Rebuild Estimator’s Xactimate supplement services team for a review and quote.
Frequently Asked Questions
1. When should I submit a supplement?
As soon as the scope gap is documented, ideally before tear-off or rebuild is complete so a reinspection can verify conditions. Also check your policy and carrier for any deadlines on supplemental claims.
2. Can I submit more than one supplement per claim?
Yes. Label them Supplement 1, Supplement 2, and so on, each with its own narrative and evidence set.
3. Is an ESX file required?
Most reviewers prefer it because it opens directly in Xactimate. If you’re unsure what a specific carrier requires, check the loss notice or claims portal, where format requirements are usually listed.
4. Do all carriers accept the same package?
No. Some prefer an ESX file plus a PDF, and others use portals. Check the loss notice for instructions before sending.
5. What’s the difference between a supplement and a reinspection?
A supplement is the revised estimate and supporting proof you submit. A reinspection is an in-person re-check by the carrier. You can request one alongside the supplement when conditions need to be verified on site.